 |
| Hepatica (7mm) (click to enlarge) |
| Preface |
|
I
found it quite difficult to polish and study my first unpolished amber; Internet
did not yet exist and advice were contradictory, so I had to try various ways .
The method I am using now works quite well, yet I should be grateful for further
suggestions. |
![]()
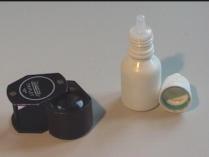
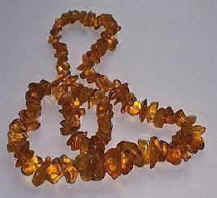
| Some advice for a good buy |
|
The
price for a piece of polished and transparent amber is mainly based on three
factors: its weight, the dimension of the inclusion and its rarity. On
the Italian market you can find unpolished or only partly treated amber, less
expensive but opaque , what makes it difficult to see inclusions. In
order to better understand what the inclusions are like I always keep ready a
bit of paraffin oil. One drop will make the amber momentarily transparent. With
the help of a good magnifier (10x) I may then check whether the inclusions are
of any interest. However, these pieces have often been subject to a first selection so it is not easy to find rarities. Whereas necklaces of unpolished amber are available at reasonable prices ( approx. 15 – 20 € ), have not been subject to selection and may offer you some pleasant surpise.
|
![]()
|
|
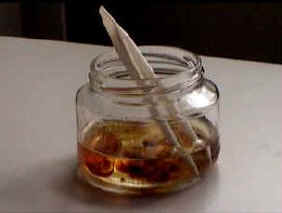 |
Once I realized that when polishing amber under running water some darker layers turned lighter at first, to become opaque again later. These stratifications are due to microflaws on the surface
that allowed the water to penetrate, therefore opacity must be due to some
soluble material penetrated inside. Since then, when treating a newly acquired piece of amber, I use the following method The results are not always satisfactory, but at times the opacities disappear significantly thus revealing inclusions not visible at first.
|
|
|
|
This
is undoubtedly the most delicate and difficult
part of the work. What
you need is a drill, emery paper of various grain, small cutters and cutting
disks, polishing paste and … a lot of patience. Normally I prefer to maintain the integrity of a piece of amber. Yet sometimes it is necessary to cut it in order to eliminate some imperfection and to create a plane surface, possibly parallel to the inclusion. Small irregolarities even though perfectly transparent may
allow for a good observation when slightly enlarged, but may create considerable
distorsion at bigger enlargement. Once
cut the amber needs polishing with emery paper ( the same used for car repair )
and water. Best start with 100 gr and subsequently use up to 1000gr, sticking
the paper on a small piece ( 2cm ) of rubber.
It
is very important to hold the amber tightly between your fingers. I found a
useful suggestion on the site of Doug Lundberg: put some biadhesive tape on the
tip of both your thumb and forefinger so you will be able to easily grip the
amber. As it is nearly impossible to find emery disks of 500 to 1000gr I prepare them myself. Stick a piece of emergy paper on one side of some biadhesive tape, keeping the protection on the other side. With a pair of scissors then cut a few
disks, take off the protective paper and stick
them on your drill base. In order to not overheat the amber it is best to
cut and grind it under running water with the drill at low speed to avoid
splashes (use a waterproof apron!). When
finished with 1000 gr pass on to the very polishing with the help of a cloth or
fix a woollen disk on the drill.
The paste I use is the same as for cars, as it contains abrasive and a little
silicone which protects the amber from aggression by the air. Lately
I bought a product offered by Gemmarum
Lapidator (AT 6) that costs little and
seems to work fine (via internet).
|


|
|
|
You may find a lot of details now you haven’t seen before, some may be even more exciting than the inclusion you bought it for. In the beginning a magnifier (10x) will do, however, in order to study tiny details you best make a financial effort. Get yourself a good binocular microscope for entomologists provided with a connection for a camera or a video. |
.JPG) |
|
A
microscope for microbiology will not do so well as its angle is too narrow and
the focal distance is too short to allow to explore deep enough, especially if
the amber is rather thick; with
such a microscope you may yet observe pollen, collemboli
a.s.o. in thin slices of polished amber fixed on glass. Personally
I use a binocular with varying enlargement (4x to 98x); with the help of an
optical supplement and the video camera connected to the computer I took a lot
of the photos of my visual database; furthermore
I built an optical fibre lamp to illuminate difficult parts of the sample. In
order to get a better contrast or background for some pictures I use filters of
coloured glass (red, green, blue and yellow). |
![]()
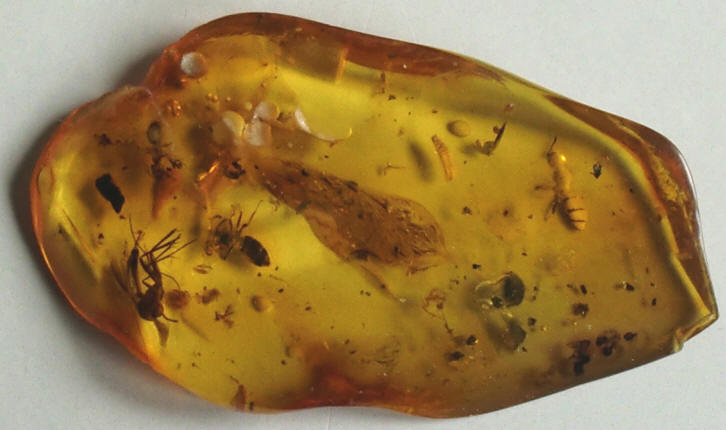
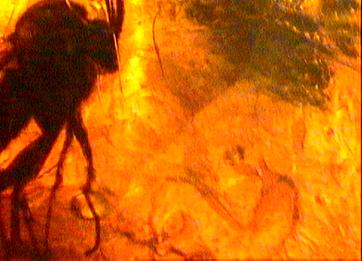
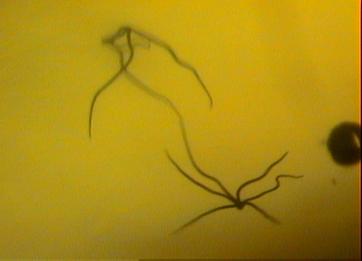
| Amber 0780 |
|
Exploration of amber
Ants, flies, worms, stellate hairs, numerous seeds.
|
 |
|
| With 40x magnification, you can observe in detail the inclusions contained.
|
 |
|
|
|
Recollecting
school days wasn’t of much help, so I had to study some texts on
zoology and botanics. My
thanks to Dr. Arnold Volker who
suggested a small volume by A. Ross “Amber – the natural time capsule”; it
is easy too read and a pratical guide to a first classification of the
inclusions. I
will often consult a more detailed book “Guida agli Insetti d’Europa” by
Michael Chinery, edited by Franco Muzzio and for the aracnidia and crostacea the
book by Remy Perrier “La Faune de la France”, 2nd part, edited by
Delagrave; you may also find useful information on the web. By now I am able to classify most of the inclusions by order. |
 |
I keep my samples in black plastic folders you may find in electronic shops. They are cheap and inside there are lots of small rectangular cells. Lined with thin rubber on both sides the amber
is well protected from shock. These
folders are divided in diptera, hemiptera, isoptera a.s.o., but what to do in
case of one piece of amber containing different inclusions? I resolved the
problem ignoring it. If necessary I can consult my database and readily get a
list of all samples and their respective position in the folders. The
database lists each and every amber by a progressive number, a folder number, a
number for the position in the folder , a description of the content and documentation of the inclusions.
|
![]()
|
|
|
Man has always tried to imitate or falsificate amber, even Leonardo da Vinci. See also the interesting article by Eugenio Ragazzi on the site “Amber, a View of the Past” – Historical Amber. In our days falsification is done with the
help of fenolic resins, plastic material or by means of high pressure fonding
amber scraps and plastics (ambroids). -
salt water test: genuine amber will float in a mix of water and cooking salt -
needle test: heat read the tip of a needle and touch the sample: plastic will
have a bad smell whereas amber and copal smell of resin -
alcol test: amber, contrary to copal or other resins does not dissolve in alcol
or ethyl oxide -
nail test: your finger nail may sign copal but not amber. Sometimes
working the amber may modify the inner aspect or even cause considerable harm to
inclusions. |
|
These
methods are mainly applied for jewels. Keep
in mind that a good falsification of inclusions in amber requests ability and
labour, so it will only be used for
rare pieces. Diffidate
from amber that contains big insects in perfect state of conservation. A big
insects was hardly to remain prisoner in the resin as it had enough strength to
escape. In case it got trapped and died its high content of water and organic
material accelerated decomposition and thus perfect conservation was impossible. You
may find some coarse imitations in transparent resins containing big insects,
which you can immediately recognize by their weight. Copal
is a ‘young’ resin (5 – 10 million years). It may have beautiful
inclusions and is often sold for amber. If you are in doubt test with your
finger nail or if possible ethylic alcol. |
|
To be sure that your piece of amber is of baltic origin have a look for small polypoid inclusions of vegetable origin that are quite frequent and will not be found in copal or amber of different origin. |
![]()